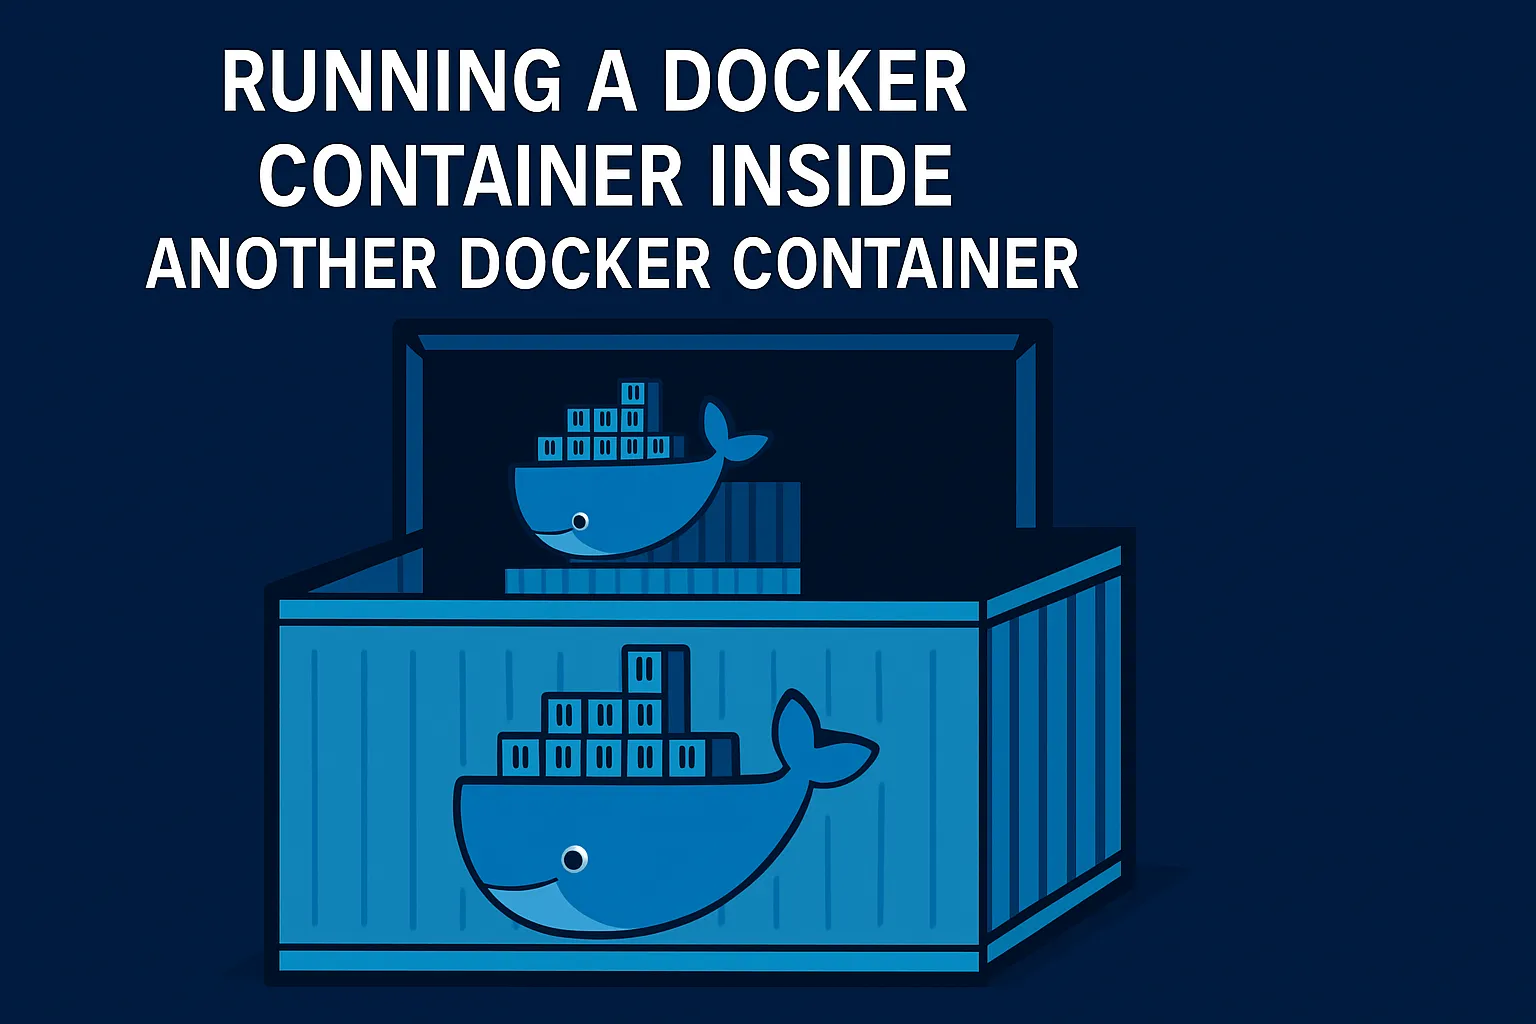
Running a Docker Container in a Docker Container (DinD)
· updated · post docker container devops dind
0. High-Level Introduction (Why Run Docker in Docker?)
Imagine you’re using Docker to run your applications or build processes. Now, what if one of those processes, running inside a Docker container, needs to build another Docker image or start other Docker containers? This is the core idea behind “Docker-in-Docker”.
While it sounds a bit like inception, this capability is surprisingly useful, especially in automated environments like Continuous Integration/Continuous Deployment (CI/CD) pipelines (e.g., Jenkins, GitLab CI) where build jobs run in containers but need to produce Docker images as output. It’s also used for complex testing scenarios or specialized development environments.
However, allowing one container to control Docker operations introduces significant security considerations and technical nuances. This manual provides a detailed guide for technical users on how to achieve this, covering the common methods, their trade-offs, security implications, and practical examples. If you need a container to interact with the Docker API, this guide explains how to do it correctly and cautiously.
1. Technical Introduction
1.1 What is Docker-in-Docker?
Docker-in-Docker refers to the practice of running Docker commands and managing Docker containers from within another Docker container. This allows a containerized environment to interact with the Docker API, build images, and run sibling or child containers.
1.2 Common Use Cases
- CI/CD Pipelines: Jenkins, GitLab CI, GitHub Actions, etc., often run build jobs inside containers. These jobs might need to build Docker images or run services using Docker Compose.
- Testing Frameworks: Integration tests that require spinning up multiple containerized services (databases, APIs) managed by the test runner itself.
- Development Environments: Providing developers with a consistent, containerized environment that includes the ability to build and run other containers.
- Container Orchestration Development/Testing: Experimenting with tools that interact with the Docker API.
1.3 Key Approaches & Terminology (DinD vs. DooD)
While often used interchangeably, there’s a distinction:
- Docker-out-of-Docker (DooD): This involves mounting the host machine’s Docker control socket (
/var/run/docker.sock) into the container. The Docker client inside the container communicates directly with the Docker daemon running on the host. Containers launched this way are siblings to the container running the client, not children nested within it. This is the most common and often simpler method. - True Docker-in-Docker (DinD): This involves running a completely separate, isolated Docker daemon inside the container. This requires special privileges and configuration (like using the official
docker:dindimage). Containers launched this way are children of the inner Docker daemon.
This guide covers both approaches.
2. Prerequisites
- Host Machine: A system (Linux, macOS, Windows with WSL2) with Docker Engine installed and running.
- Docker CLI: Familiarity with basic Docker commands (
docker run,docker build,docker ps,docker exec, etc.). - Understanding of Docker Concepts: Images, containers, volumes, networking, Docker socket.
- (Optional but Recommended): Understanding of Linux permissions and security implications of privileged operations.
3. Method 1: Mounting the Host’s Docker Socket (DooD)
This method allows a container to control the host’s Docker daemon.
3.1 Concept
The Docker daemon listens for API requests on a Unix socket, typically located at /var/run/docker.sock on Linux. By mounting this socket file into a container using a volume (-v), the Docker client installed inside that container can connect to and control the host’s Docker daemon.
3.2 Pros & Cons
Pros:
- Simplicity: Relatively easy to set up with a simple volume mount.
- Resource Efficiency: No overhead of running a second Docker daemon.
- Shared Resources: Layers are shared with the host daemon, potentially speeding up builds and pulls if images already exist on the host.
Cons:
- Security Risk: A container with access to the host’s Docker socket effectively has root-equivalent privileges on the host system. It can start privileged containers, mount sensitive host directories, and interfere with other containers. This is the primary drawback.
- Version Skew: Potential issues if the Docker client version inside the container is incompatible with the Docker daemon version on the host.
- Environment Bleed: The container interacts directly with the host’s Docker environment, which might not be desired for isolation purposes.
3.3 Implementation Steps & docker exec Access
- Prepare a Dockerfile: Create an image that includes the Docker client CLI. Ensure the
CMDorENTRYPOINTkeeps the container running (e.g.,CMD ["sleep", "infinity"]). - Build the Image: Use
docker build. - Run the Container: Use
docker runwith the-v /var/run/docker.sock:/var/run/docker.sockflag. Run it detached (-d) and give it a name (--name) for easy access (e.g.,dood-controller). - Access the Container: Use
docker exec -it dood-controller bash(orsh) to get an interactive terminal inside the running container. - Run Docker Commands: From the
execsession, execute standard Docker commands (e.g.,docker ps,docker run hello-world,docker build .). These commands will interact with the host’s Docker daemon via the mounted socket. Containers started this way are siblings todood-controller.
3.4 Code Example (Including docker exec usage)
Dockerfile (Installs Docker client on Debian)
# Use a base image
FROM debian:bullseye-slim

# Avoid prompts during installation
ENV DEBIAN_FRONTEND=noninteractive

# Install prerequisites and Docker client
RUN apt-get update && \
    apt-get install -y --no-install-recommends \
    apt-transport-https \
    ca-certificates \
    curl \
    gnupg \
    lsb-release && \
    mkdir -p /etc/apt/keyrings && \
    curl -fsSL https://download.docker.com/linux/debian/gpg | gpg --dearmor -o /etc/apt/keyrings/docker.gpg && \
    echo \
      "deb [arch=$(dpkg --print-architecture) signed-by=/etc/apt/keyrings/docker.gpg] https://download.docker.com/linux/debian \
      $(lsb_release -cs) stable" | tee /etc/apt/sources.list.d/docker.list > /dev/null && \
    apt-get update && \
    apt-get install -y --no-install-recommends docker-ce-cli && \
    apt-get clean && \
    rm -rf /var/lib/apt/lists/*

# Keep the container running indefinitely
CMD ["sleep", "infinity"]
Build Command (on Host):
docker build -t my-docker-client .Run Command (on Host):
# Ensure the user running this command has permissions for the host's docker.sock
# Run detached (-d) and give it a name
docker run -d --name dood-controller \
  -v /var/run/docker.sock:/var/run/docker.sock \
  my-docker-client

# Verify the container is running
docker ps
Access and Run Commands Inside (on Host):
# Get an interactive shell inside the running container
docker exec -it dood-controller bash

# Now, inside the 'dood-controller' container's bash session:
# These commands interact with the HOST Docker daemon

# List containers running on the HOST (will include 'dood-controller' itself)
echo "Running 'docker ps' inside the container:"
docker ps

# Run a new container (sibling to 'dood-controller') on the HOST
echo "Running 'hello-world' inside the container:"
docker run --rm hello-world

# List images available on the HOST
docker images

# Exit the container's shell
exit
Cleanup (on Host):
docker stop dood-controller
docker rm dood-controller
3.5 Security Considerations (DooD)
- Never run untrusted images with the Docker socket mounted. This grants the image potential control over your host.
- Permissions: The user inside the container needs permission to write to the socket. Often, the socket on the host is owned by
rootand groupdocker. You might need to:- Run the container as root (less secure).
- Create a
dockergroup inside the container with the same GID as thedockergroup on the host, and run the container process as a user belonging to that group. This requires knowing the host’s GID beforehand.
- Consider read-only mounts (
-v /var/run/docker.sock:/var/run/docker.sock:ro) if the container only needs to query the Docker API.
4. Method 2: Running a Dedicated Docker Daemon Inside (True DinD)
This method runs an independent dockerd process inside your container.
4.1 Concept
You run a container based on an image specifically designed for DinD (like the official docker:dind image). This container starts its own Docker daemon process. To interact with this inner daemon, you typically run a second container (the “client”) that connects to the inner daemon, often via TCP or by sharing a volume for the inner daemon’s socket. This requires running the DinD container in --privileged mode due to the low-level system operations dockerd needs to perform.
4.2 Pros & Cons
Pros:
- Better Isolation (Theoretically): The inner Docker daemon is separate from the host daemon. Actions inside don’t directly affect the host’s Docker environment (though
--privilegedbypasses many host protections). - Clean Environment: Useful for tests requiring a pristine Docker environment without interference from the host’s images or containers.
- Version Control: You control the exact version of the inner Docker daemon, independent of the host.
Cons:
- Complexity: Requires running the DinD container and linking/networking a client container to it.
--privilegedRequirement: Running containers in privileged mode is highly insecure. It disables most container isolation mechanisms, giving the container near-root access to the host kernel and devices. This is a major security risk.- Resource Overhead: Running a full Docker daemon inside a container consumes more RAM and CPU.
- Storage Driver Issues: The inner
dockerdneeds a suitable storage driver. This often works with--privilegedbut can be problematic. - Networking Complexity: Managing network connections between the host, the DinD container, and the containers started by the inner daemon can be complex.
4.3 Implementation Steps & docker exec Access
- Start the DinD Daemon Container: Run the
docker:dindimage with the--privilegedflag, detached (-d), and a name (e.g.,my-dind-daemon). Use Docker networking (create a network, assign an alias likedocker) for reliable connection. - Start a Client Container: Run another container (e.g., using the
dockerbase image which contains the client CLI) on the same Docker network. Set theDOCKER_HOSTenvironment variable in the client to point to the DinD daemon’s network alias and port (e.g.,tcp://docker:2375). Give this client container a name (e.g.,dind-client) and run it detached (-d) with a command to keep it alive (e.g.,sleep infinity). - Access the Client Container: Use
docker exec -it dind-client sh(orbash) to get an interactive terminal inside the client container. - Run Docker Commands: From the
execsession within the client container, execute standard Docker commands. These commands will interact with the inner Docker daemon running in themy-dind-daemoncontainer. Containers started here will be children of themy-dind-daemoncontainer and isolated from the host’s Docker environment.
4.4 Code Example (Including docker exec usage)
Step 1: Create Network and Run DinD Daemon Container (on Host)
# Create a dedicated network
docker network create dind-network

# Run the privileged DinD daemon container on the network
# Give it a network alias 'docker' for easy reference by the client
docker run -d --name my-dind-daemon --network dind-network --network-alias docker \
  --privileged \
  -e DOCKER_TLS_CERTDIR="" \
  docker:dind

# Verify the daemon container is running
docker ps
Step 2: Run a Client Container Connected to the DinD Daemon (on Host)
# Run the client container on the same network, pointing DOCKER_HOST to the daemon
# Run detached (-d) and give it a name, keep it alive with sleep
docker run -d --name dind-client --network dind-network \
  -e DOCKER_HOST=tcp://docker:2375 \
  docker sleep infinity # Use 'docker' image which has the client CLI

# Verify the client container is running
docker ps
Step 3: Access Client Container and Run Commands Inside (on Host)
# Get an interactive shell inside the running CLIENT container
docker exec -it dind-client sh # 'docker' image uses sh by default

# Now, inside the 'dind-client' container's sh session:
# These commands interact with the INNER Docker daemon ('my-dind-daemon')

# List containers managed by the INNER daemon (should be empty initially)
echo "Running 'docker ps' inside the client (against inner daemon):"
docker ps

# Run a new container managed by the INNER daemon
echo "Running 'hello-world' inside the client (against inner daemon):"
docker run --rm hello-world

# Verify the hello-world container ran by checking the inner daemon's container list again
docker ps # Should show no running containers as hello-world exited

# List images known to the INNER daemon (will now include hello-world)
docker images

# Exit the client container's shell
exit
Cleanup (on Host):
docker stop dind-client my-dind-daemon
docker rm dind-client my-dind-daemon
docker network rm dind-network
4.4.1 Security Considerations (True DinD)
--privilegedis Dangerous: This is the biggest concern. It essentially breaks container isolation. Avoid it if at all possible. If you must use it, only run trusted images and be fully aware of the risks.- Resource Exhaustion: The inner daemon could potentially consume excessive host resources.
- Kernel Exploits: Any kernel vulnerability exploitable from within a container becomes much easier to leverage when running as
--privileged.
4.5 Advanced Example: Controlling Docker via Python/Jupyter (using DooD)
This example demonstrates setting up a primary container running Jupyter Notebook. From within the notebook, we will use the docker Python library to interactively manage containers via the host’s Docker daemon (using the mounted socket - DooD method). This avoids calling shell commands directly from Python.
Concept:
- A “main” container is built with Python, the Docker client CLI, the
dockerPython library, and Jupyter Notebook. - This main container is run using the DooD method, mounting
/var/run/docker.sock. - Jupyter Notebook is started inside the main container, exposing its port (8888).
- The user connects to Jupyter via a web browser.
- Python code within a Jupyter cell uses the
dockerlibrary to connect to the Docker daemon (via the mounted socket) and execute operations like listing or running containers.
Security Warning: This setup inherits all the security risks of the DooD method. The container (and thus the Jupyter Notebook environment and the docker library running within it) has significant control over the host’s Docker daemon. The example runs Jupyter without token authentication for simplicity; in any real-world scenario, you MUST enable authentication.
4.5.1 Implementation Steps
- Create Dockerfile: Define a Dockerfile installing Python, Docker CLI,
dockerlibrary, and Jupyter. - Build Image: Build the Docker image using
docker build. - Run Container: Run the container, mounting the Docker socket and publishing the Jupyter port.
- Access Jupyter: Open a web browser to
http://localhost:8888(or the host’s IP). - Execute Code: Create a new Jupyter Notebook and run the provided Python code snippet using the
dockerlibrary.
4.5.2 Code Example
Dockerfile.jupyter_dockerpy_dood
# Start from a Python base image
FROM python:3.10-slim

# Set working directory
WORKDIR /app

# Avoid prompts during installation
ENV DEBIAN_FRONTEND=noninteractive

# Install prerequisites (curl, gpg, etc.) and Docker client CLI
# (CLI is still useful for potential debugging inside the container)
RUN apt-get update && \
    apt-get install -y --no-install-recommends \
    apt-transport-https \
    ca-certificates \
    curl \
    gnupg \
    lsb-release && \
    mkdir -p /etc/apt/keyrings && \
    curl -fsSL https://download.docker.com/linux/debian/gpg | gpg --dearmor -o /etc/apt/keyrings/docker.gpg && \
    echo \
      "deb [arch=$(dpkg --print-architecture) signed-by=/etc/apt/keyrings/docker.gpg] https://download.docker.com/linux/debian \
      $(lsb_release -cs) stable" | tee /etc/apt/sources.list.d/docker.list > /dev/null && \
    apt-get update && \
    apt-get install -y --no-install-recommends docker-ce-cli && \
    apt-get clean && \
    rm -rf /var/lib/apt/lists/*

# Install Jupyter Notebook and the Docker Python library
RUN pip install --no-cache-dir notebook docker

# Expose Jupyter default port
EXPOSE 8888

# Start Jupyter Notebook on container startup
# WARNING: Disables token authentication for simplicity. SECURE THIS IN PRODUCTION.
CMD ["jupyter", "notebook", "--ip=0.0.0.0", "--port=8888", "--allow-root", "--NotebookApp.token=''", "--NotebookApp.password=''"]
Build Command (on Host):
docker build -t jupyter-dockerpy-dood -f Dockerfile.jupyter_dockerpy_dood .Run Command (on Host):
# Ensure the user running this command has permissions for the host's docker.sock
# Run detached, named, mount socket, publish port to localhost only
docker run -d --name jupyter-dockerpy \
  -v /var/run/docker.sock:/var/run/docker.sock \
  -p 127.0.0.1:8888:8888 \
  jupyter-dockerpy-dood

# Verify the container is running
docker ps
Access Jupyter Notebook:
Open your web browser and navigate to: http://localhost:8888
Jupyter Notebook Code Cell (Python):
Create a new Python 3 notebook and enter the following code into a cell:
import docker
import sys

print(f"Using docker library version: {docker.__version__}")
print(f"Python version: {sys.version}")

try:
    # Connect to the Docker daemon via the mounted socket
    # Uses DOCKER_HOST environment variable if set, otherwise defaults
    # to standard socket paths like /var/run/docker.sock
    client = docker.from_env()

    # Verify connection by pinging the daemon
    print("\nPinging Docker daemon...")
    if client.ping():
        print("Successfully connected to Docker daemon.")
    else:
        print("Error: Could not connect to Docker daemon.")
        # Stop execution if connection fails
        raise ConnectionError("Failed to ping Docker daemon")

    #  Example Usage

    # 1. List all containers (running and stopped) visible to the host daemon
    print("\nListing all containers (via host daemon)...")
    containers = client.containers.list(all=True)
    if containers:
        for container in containers:
            print(f"  - ID: {container.short_id}, Name: {container.name}, Status: {container.status}, Image: {container.image.tags}")
    else:
        print("  No containers found.")

    print("\n" + "="*40 + "\n")

    # 2. Run a simple Alpine container using the host Docker daemon
    print("Starting an Alpine container (via host daemon)...")
    alpine_image = "alpine:latest"
    alpine_command = "echo 'Hello from inner Alpine container!'"

    try:
        print(f"Running image '{alpine_image}' with command: '{alpine_command}'")
        # client.containers.run() streams logs by default if attach=True (default)
        # It returns the logs as bytes.
        # remove=True cleans up the container afterwards, similar to --rm
        logs = client.containers.run(
            alpine_image,
            command=alpine_command,
            remove=True,  # Equivalent to --rm
            stdout=True,
            stderr=True
        )
        print("\n Alpine Container Logs ")
        print(logs.decode('utf-8').strip()) # Decode bytes to string
        print(" End Alpine Container Logs ")
        print("Alpine container ran and was removed successfully.")

    except docker.errors.ImageNotFound:
        print(f"Error: Image '{alpine_image}' not found. Pulling image...")
        try:
            client.images.pull(alpine_image)
            print("Image pulled successfully. Please re-run the cell.")
        except docker.errors.APIError as e:
            print(f"Error pulling image: {e}")
    except docker.errors.APIError as e:
        print(f"Error running container: {e}")

except ConnectionError as e:
    print(f"Connection Error: {e}")
    print("Ensure the Docker socket is mounted correctly and the host daemon is running.")
except Exception as e:
    print(f"An unexpected error occurred: {e}")


print("\n" + "="*40 + "\n")
print("Script finished.")
Execution:
Run the cell in Jupyter Notebook. You should see:
- Confirmation of connection to the Docker daemon.
- A list of containers visible to the host daemon, including their IDs, names, and statuses (including the
jupyter-dockerpycontainer itself). - Logs indicating the Alpine container is being run.
- The output from the Alpine container (“Hello from inner Alpine container!”).
- Confirmation that the Alpine container completed and was removed.
Cleanup (on Host):
docker stop jupyter-dockerpy
docker rm jupyter-dockerpy
This revised example uses the docker Python library for cleaner, more idiomatic interaction with the Docker daemon from within the Jupyter environment, while still relying on the DooD socket-mounting technique. The security considerations remain paramount.
5. Security Best Practices (General)
- Prefer DooD (Socket Mounting) over True DinD (
--privileged) if possible, despite its own risks, as--privilegedis generally considered worse. - Understand the Risks: Fully grasp the security implications of whichever method you choose.
- Use Trusted Images: Only run well-known, verified base images.
- Least Privilege (DooD): Explore running the container process as a non-root user mapped to the host’s
dockergroup GID. - Network Segmentation: Use Docker networks to isolate components.
- Resource Limits: Apply resource constraints (CPU, memory) to the controlling container.
- Consider Alternatives: Evaluate if tools like Buildah, Kaniko, Podman, Testcontainers, or Sysbox meet your needs without requiring full DinD/DooD.
- Keep Host and Docker Updated: Regularly patch the host OS and the Docker Engine.
6. Troubleshooting Common Issues
permission deniedaccessing/var/run/docker.sock(DooD): Check host socket permissions and container user/group GID matching.Cannot connect to the Docker daemon(DooD/DinD): Verify socket mount (DooD), daemon container running status (DinD), network connectivity/DOCKER_HOSTvariable (DinD), and host daemon status.- Storage Driver Errors (True DinD): Check DinD container logs (
docker logs my-dind-daemon). May need--privilegedor specific storage driver flags (e.g.,--storage-driver=vfs, though inefficient). - Networking Issues (True DinD): Ensure proper Docker network setup for communication between the client, the DinD daemon, and any inner containers.
7. Alternatives
- Kaniko: Daemonless image builds in containers/Kubernetes. Ideal for CI/CD.
- Buildah: Daemonless OCI image building.
- Podman: Daemonless Docker-compatible engine, often better for rootless containers-in-containers.
- Testcontainers: Library for managing containerized dependencies (including DinD/DooD) in tests.
- Sysbox: Container runtime designed for secure system-level workloads like DinD without
--privileged.
8. Conclusion
Running Docker inside Docker, whether via socket mounting (DooD) or a dedicated inner daemon (True DinD), enables powerful workflows but introduces significant security considerations. DooD is simpler but grants host daemon control; True DinD offers theoretical isolation but requires the dangerous --privileged flag. Carefully evaluate the risks, prefer DooD if manageable, explore alternatives, and always prioritize security.
9. TL;DR
- Why? Needed for CI/CD pipelines, complex tests, or dev environments where a container needs to build/run other containers.
- Method 1: DooD (Docker-out-of-Docker):
- How: Mount host socket:
docker run -v /var/run/docker.sock:/var/run/docker.sock ... - Effect: Container talks to host’s Docker daemon. New containers are siblings.
- Pros: Simple, efficient, shared layers.
- Cons: Major Security Risk: Container effectively gets root on host via the socket. Potential version conflicts.
- How: Mount host socket:
- Method 2: True DinD (Docker-in-Docker):
- How: Run
docker:dindimage withdocker run --privileged .... Connect a client container to it (usually via Docker network andDOCKER_HOST=tcp://...). - Effect: Container runs its own isolated Docker daemon. New containers are children.
- Pros: Better isolation (in theory), clean environment, controlled daemon version.
- Cons: Major Security Risk: Requires
--privileged, breaking container isolation. Complex, resource-heavy.
- How: Run
- Accessing/Using: Use
docker exec -it <container_name> bashto get a shell inside the controlling container, then run standarddockercommands (docker run,docker build, etc.). - Security: Both methods are risky. Avoid
--privileged(DinD) if possible. Prefer DooD with caution, or use alternatives like Kaniko, Buildah, Podman, or Sysbox if they fit your use case.