Set up Dokploy on Hetzner in your Cloud
· updated · post dokploy cloud n8n
Dokploy is a powerful open-source deployment platform that makes it easy to run and manage projects in your own infrastructure. In this guide, we’ll go through the process of setting up a Dokploy instance on a Hetzner server and deploying your first service from a template (in this case, Plausible Analytics).
This step-by-step tutorial will walk you from bare-metal provisioning all the way to serving your first application on a custom domain.
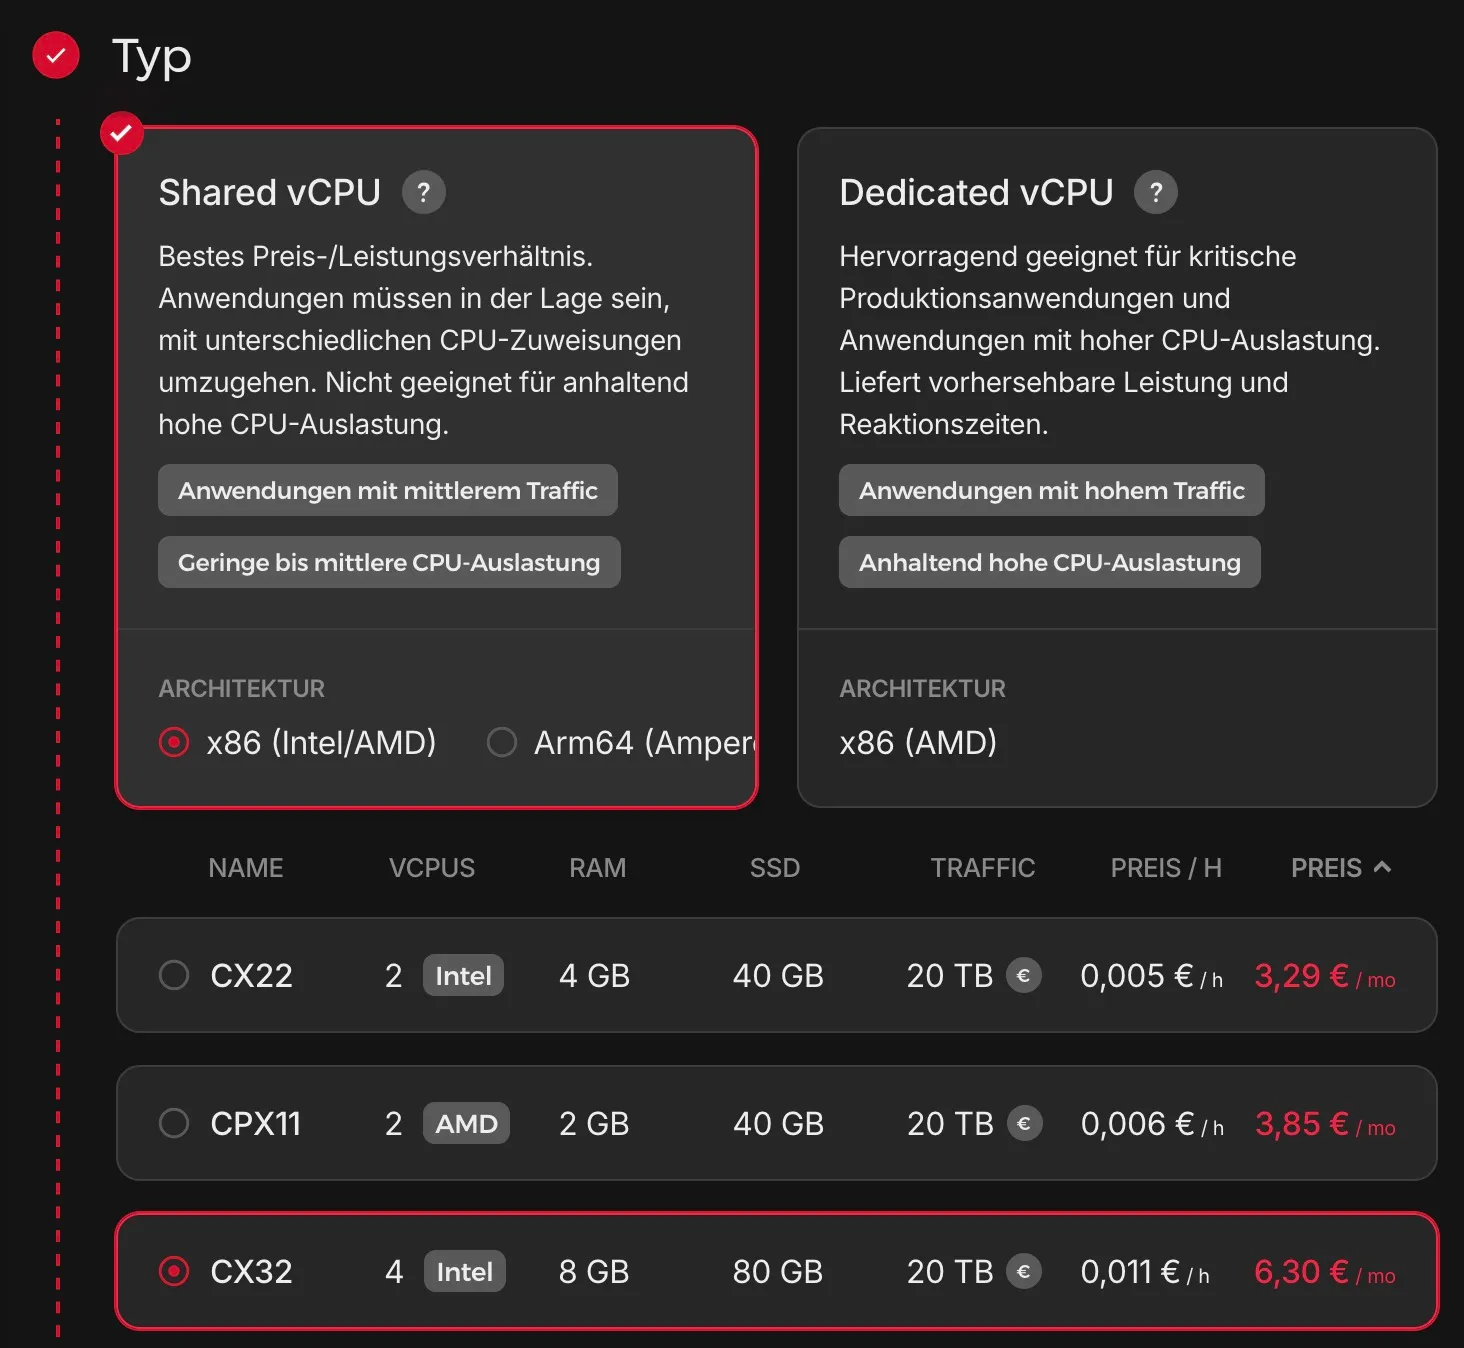
1. Provision a Hetzner Server
Start by creating a new server (Cloud or Dedicated) on Hetzner Cloud. For this tutorial, a small cloud instance is sufficient (for example, the CX22 plan with 4GB RAM).
Take note of the server’s IP address – we’ll use it later.
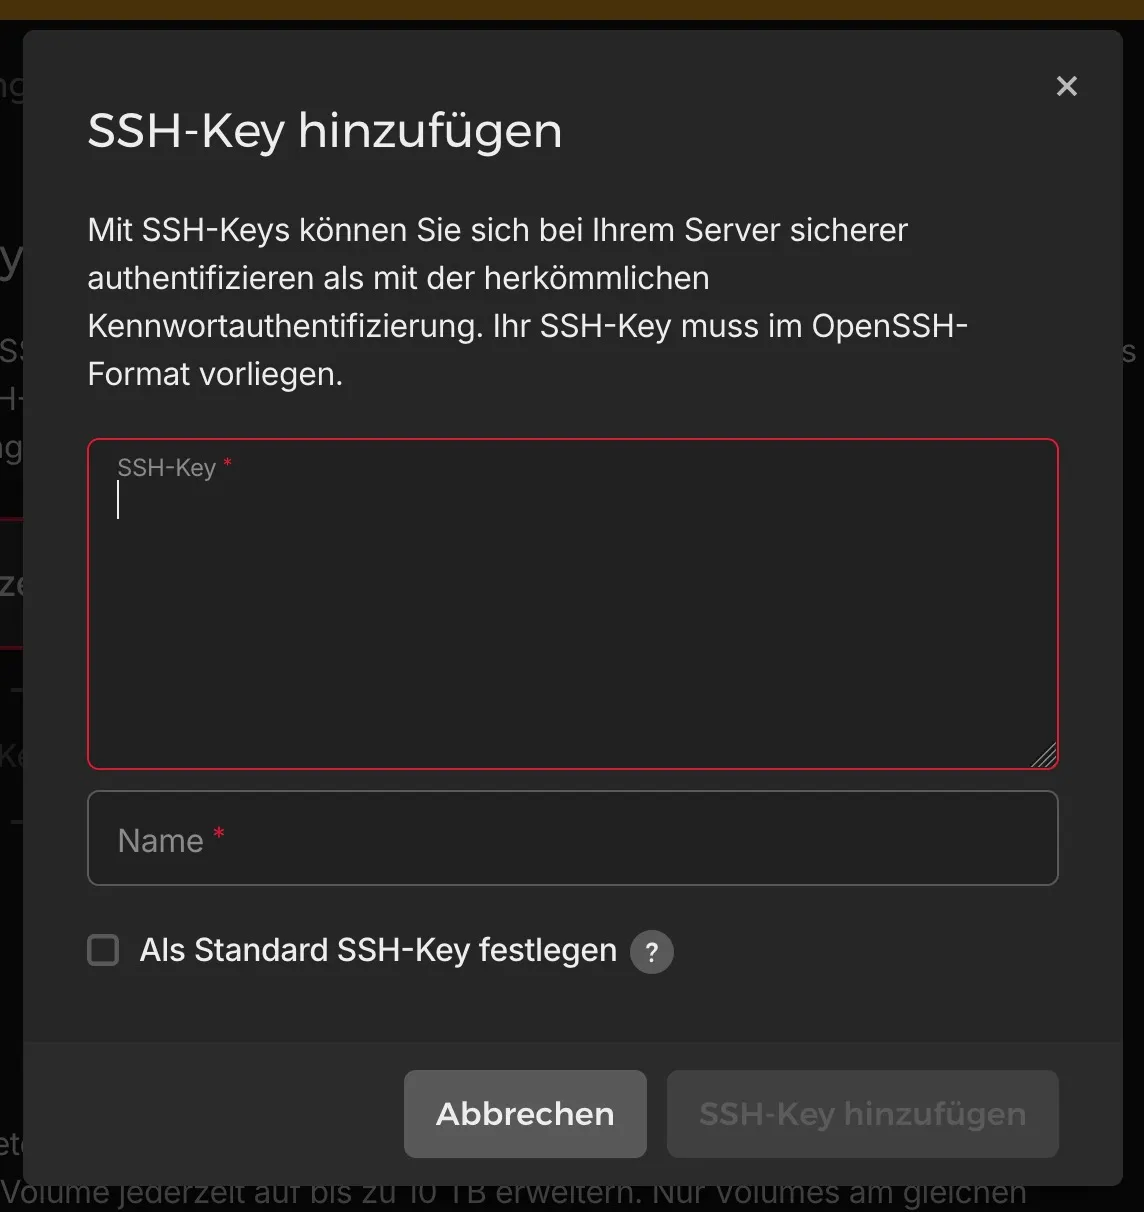
2. Generate an SSH Key
On your local machine, create an SSH key pair if you don’t already have one:
ssh-keygen -t ed25519 -f ~/.ssh/dokploy-keyBy default, this generates two files inside ~/.ssh/:
dokploy-key→ your private key (keep this safe!)dokploy-key.pub→ your public key
To get your public key, run:
cat ~/.ssh/dokploy-key.pubWhen opening the Hetzner server creation page, paste the contents of dokploy-key.pub into the SSH Keys section.
3. Connect to the Server
Open a terminal and log into the server:
ssh -i ~/.ssh/dokploy-key root@<SERVER-IP>Replace <SERVER-IP> with the Hetzner IP address. If you leave out “~/.ssh/dokploy-key” you will be asked for the password instead of using the SSH key. This password is sent to your email when the server is created.
4. Install Dokploy
Once connected, run the following installation command provided by Dokploy:
curl -sSL https://dokploy.com/install.sh | shThis will install and start Dokploy on your server.
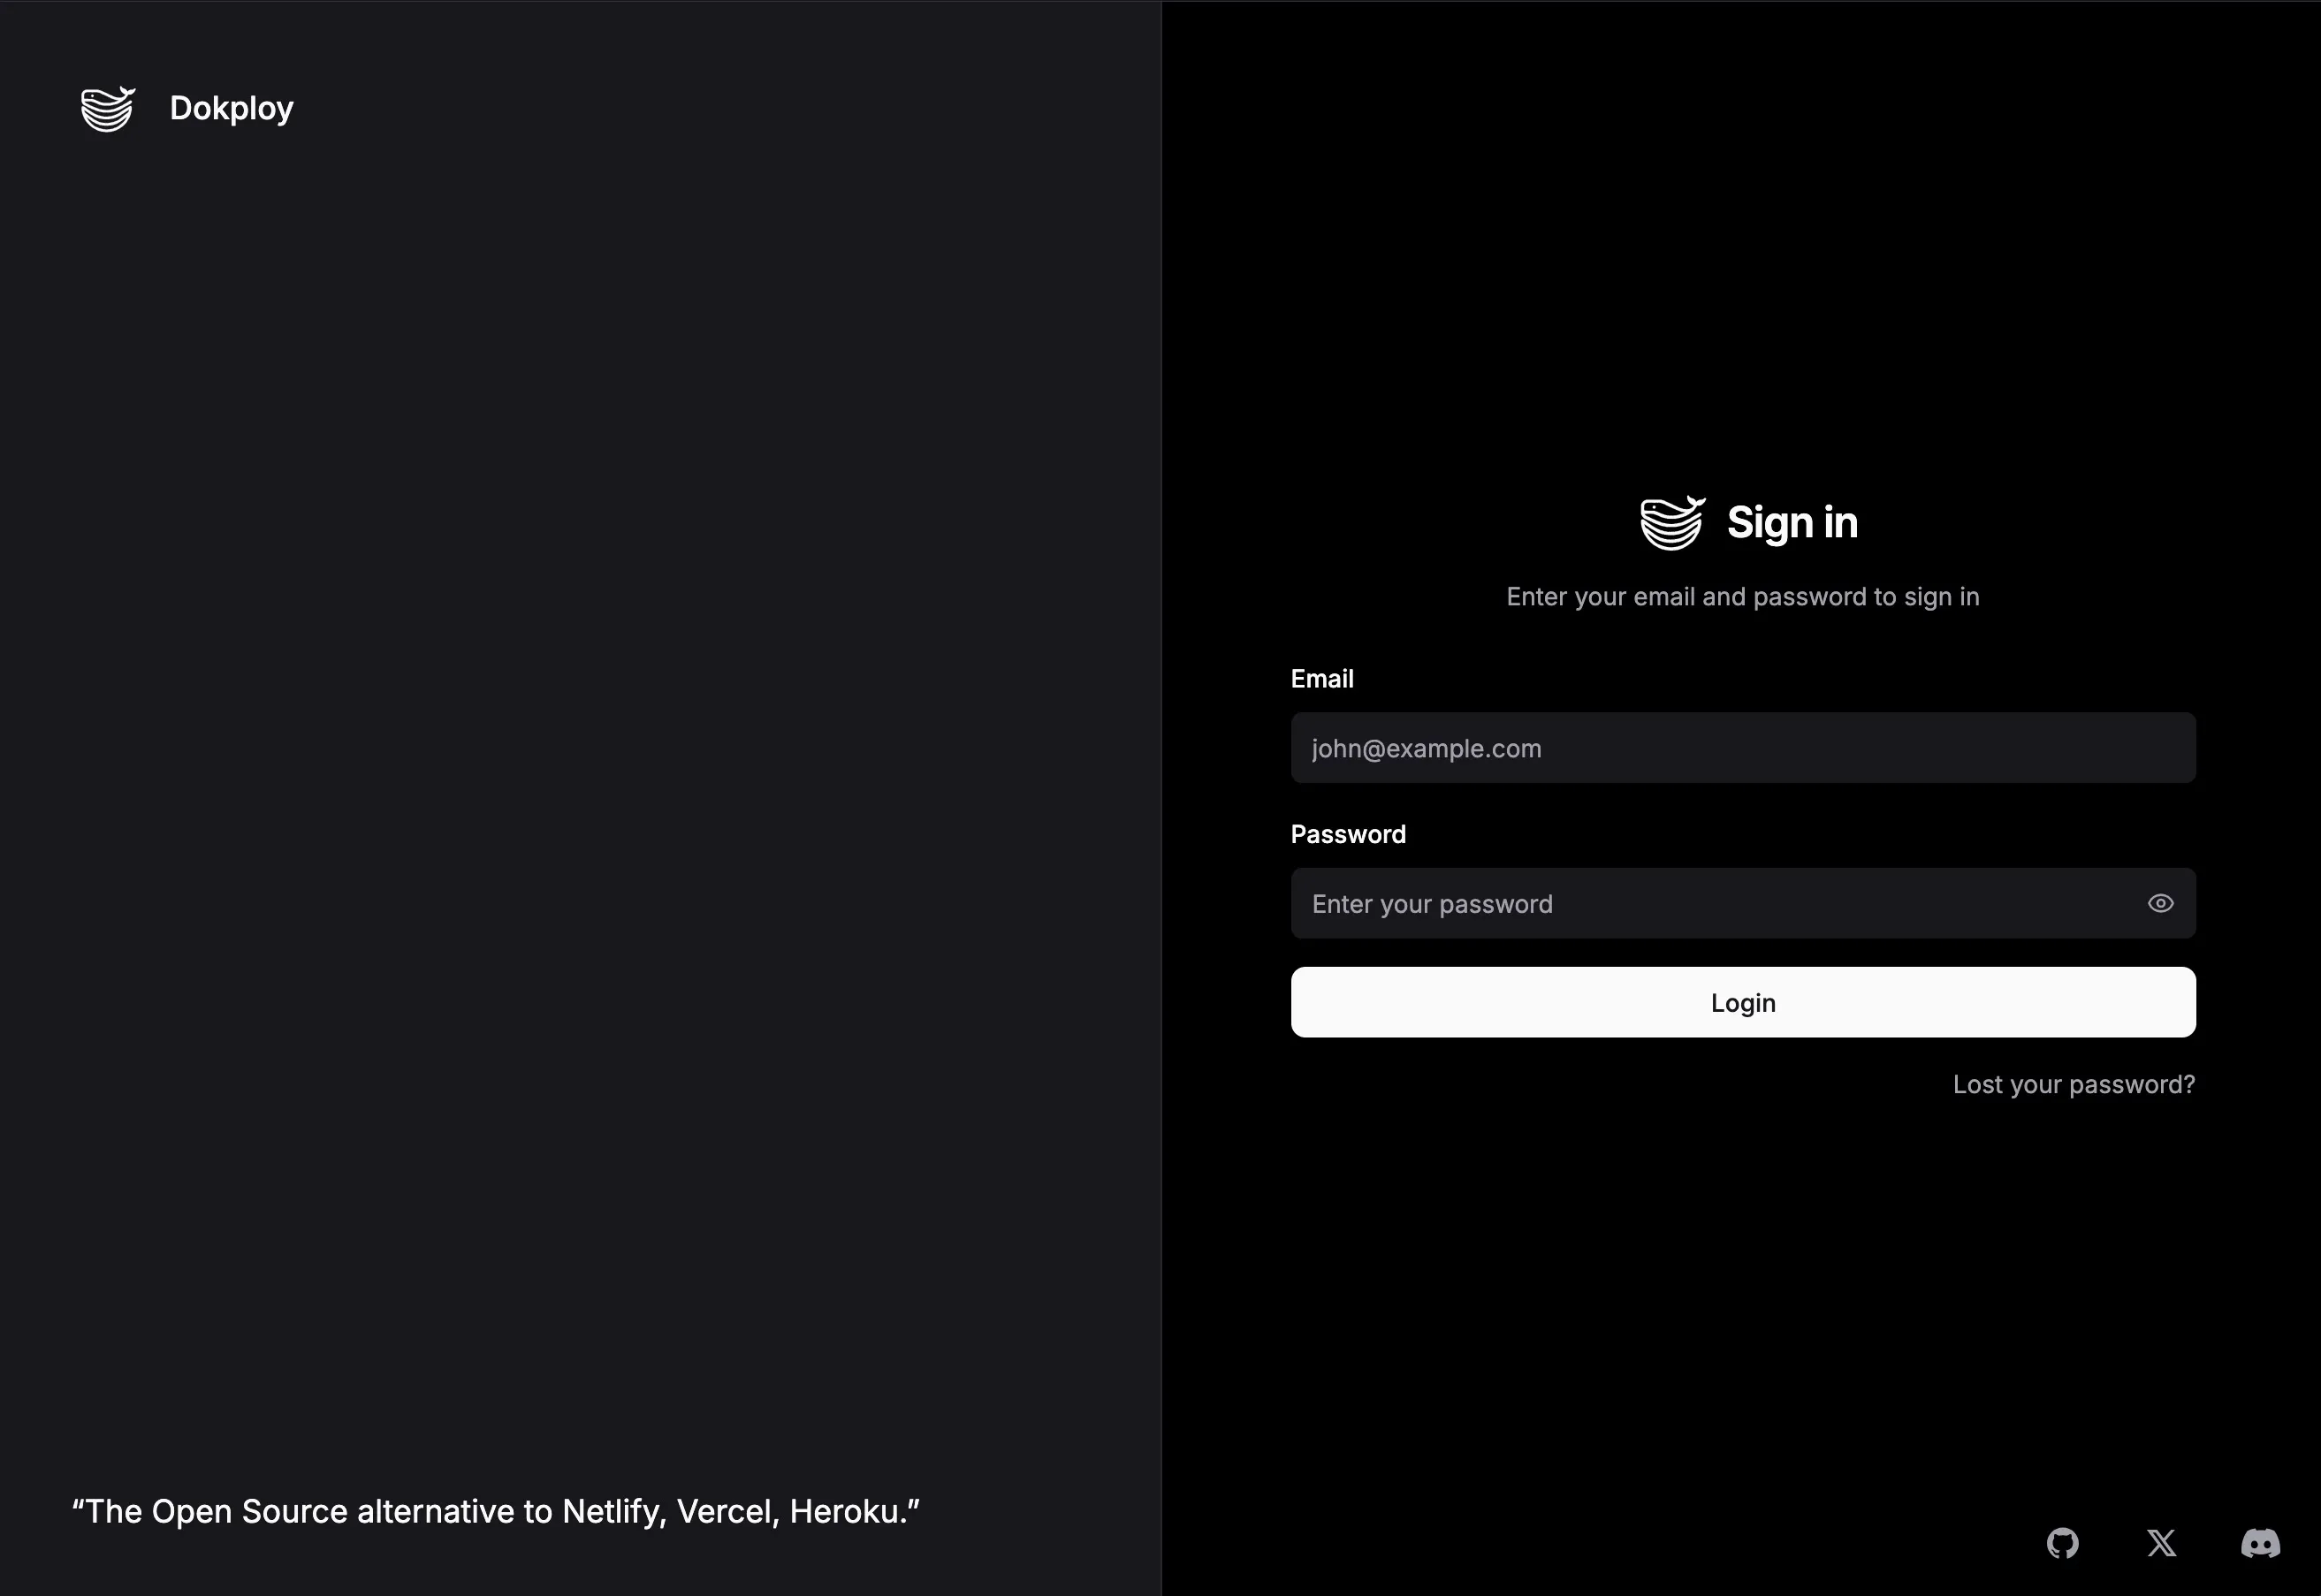
5. Access the Dokploy Dashboard
After installation, you can access the Dokploy dashboard by visiting:
http://<SERVER-IP>:3000
The dashboard should load, and you’ll be prompted to create your admin account.
6. Configure DNS
To use your own domain, create an A record in your DNS provider’s dashboard that points to the Hetzner server’s IP address.
Example:
@ A yourdomain.com <SERVER-IP>
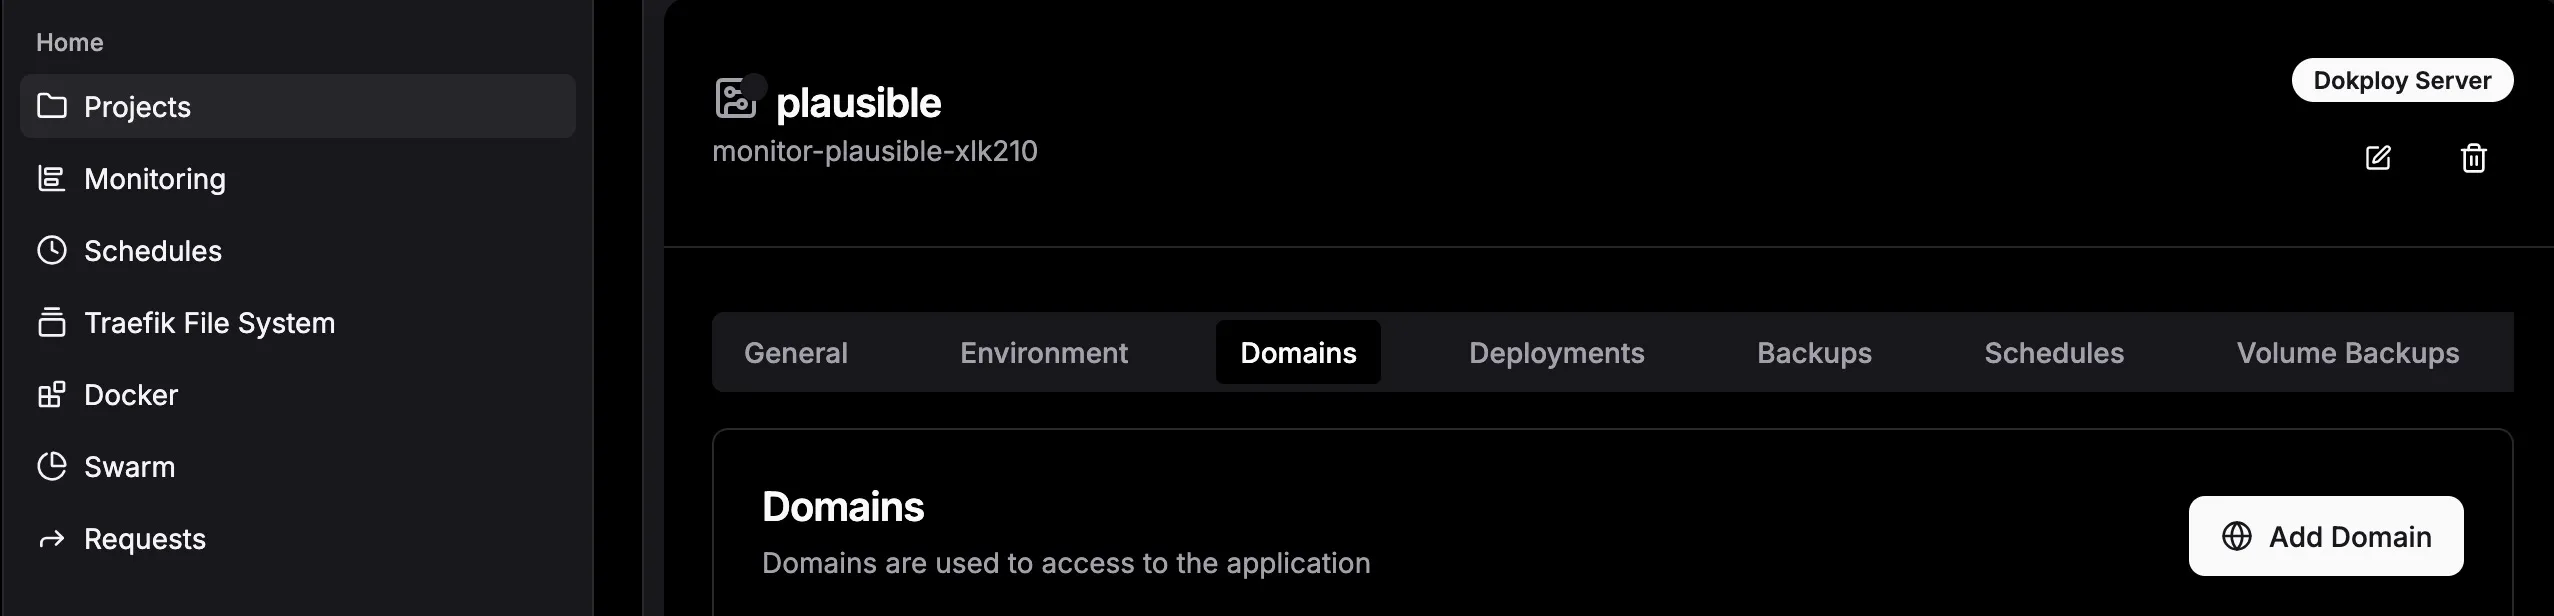
7. Set Domain in Dokploy
Back in the Dokploy dashboard, go to Webserver → Domain and update the domain from the default IP to your actual domain.
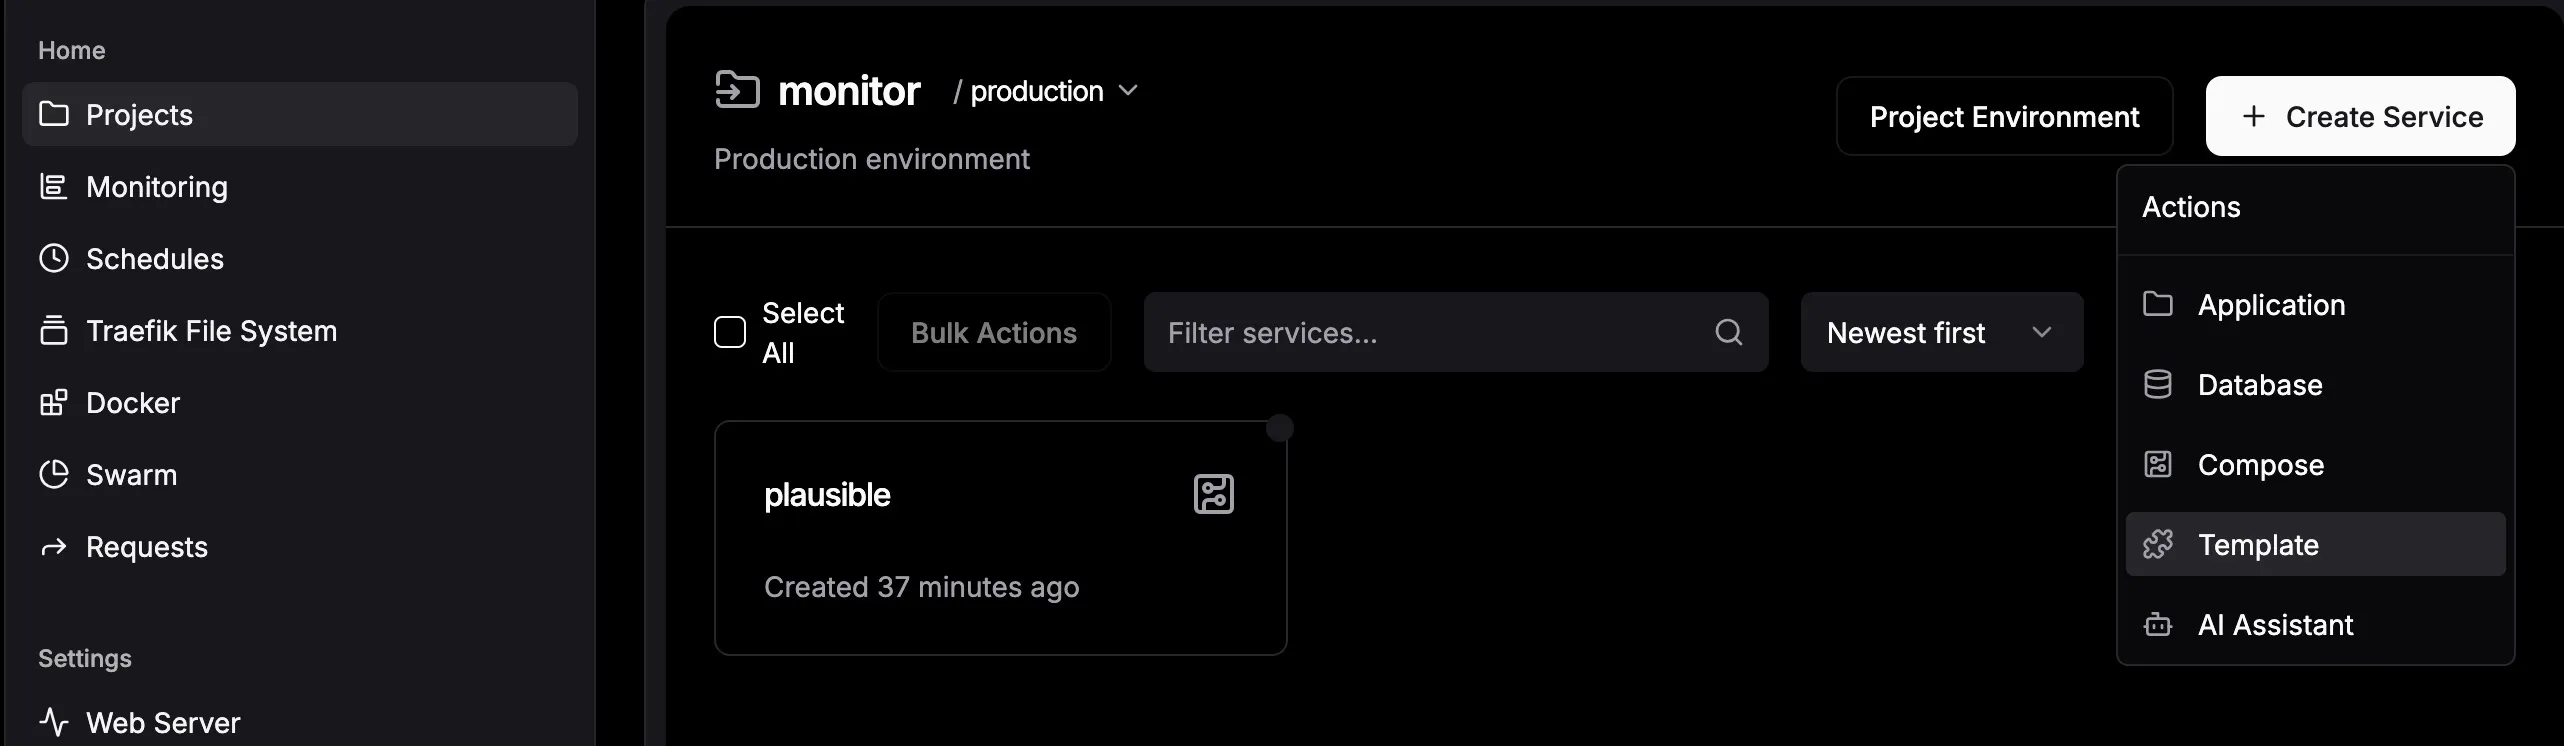
8. Deploy a Service from Templates
Dokploy includes a set of pre-built templates for common services.
- Open the Projects section and create a new project
- Open the Templates section
- Select Plausible (or another service of your choice)
- Deploy it with a single click
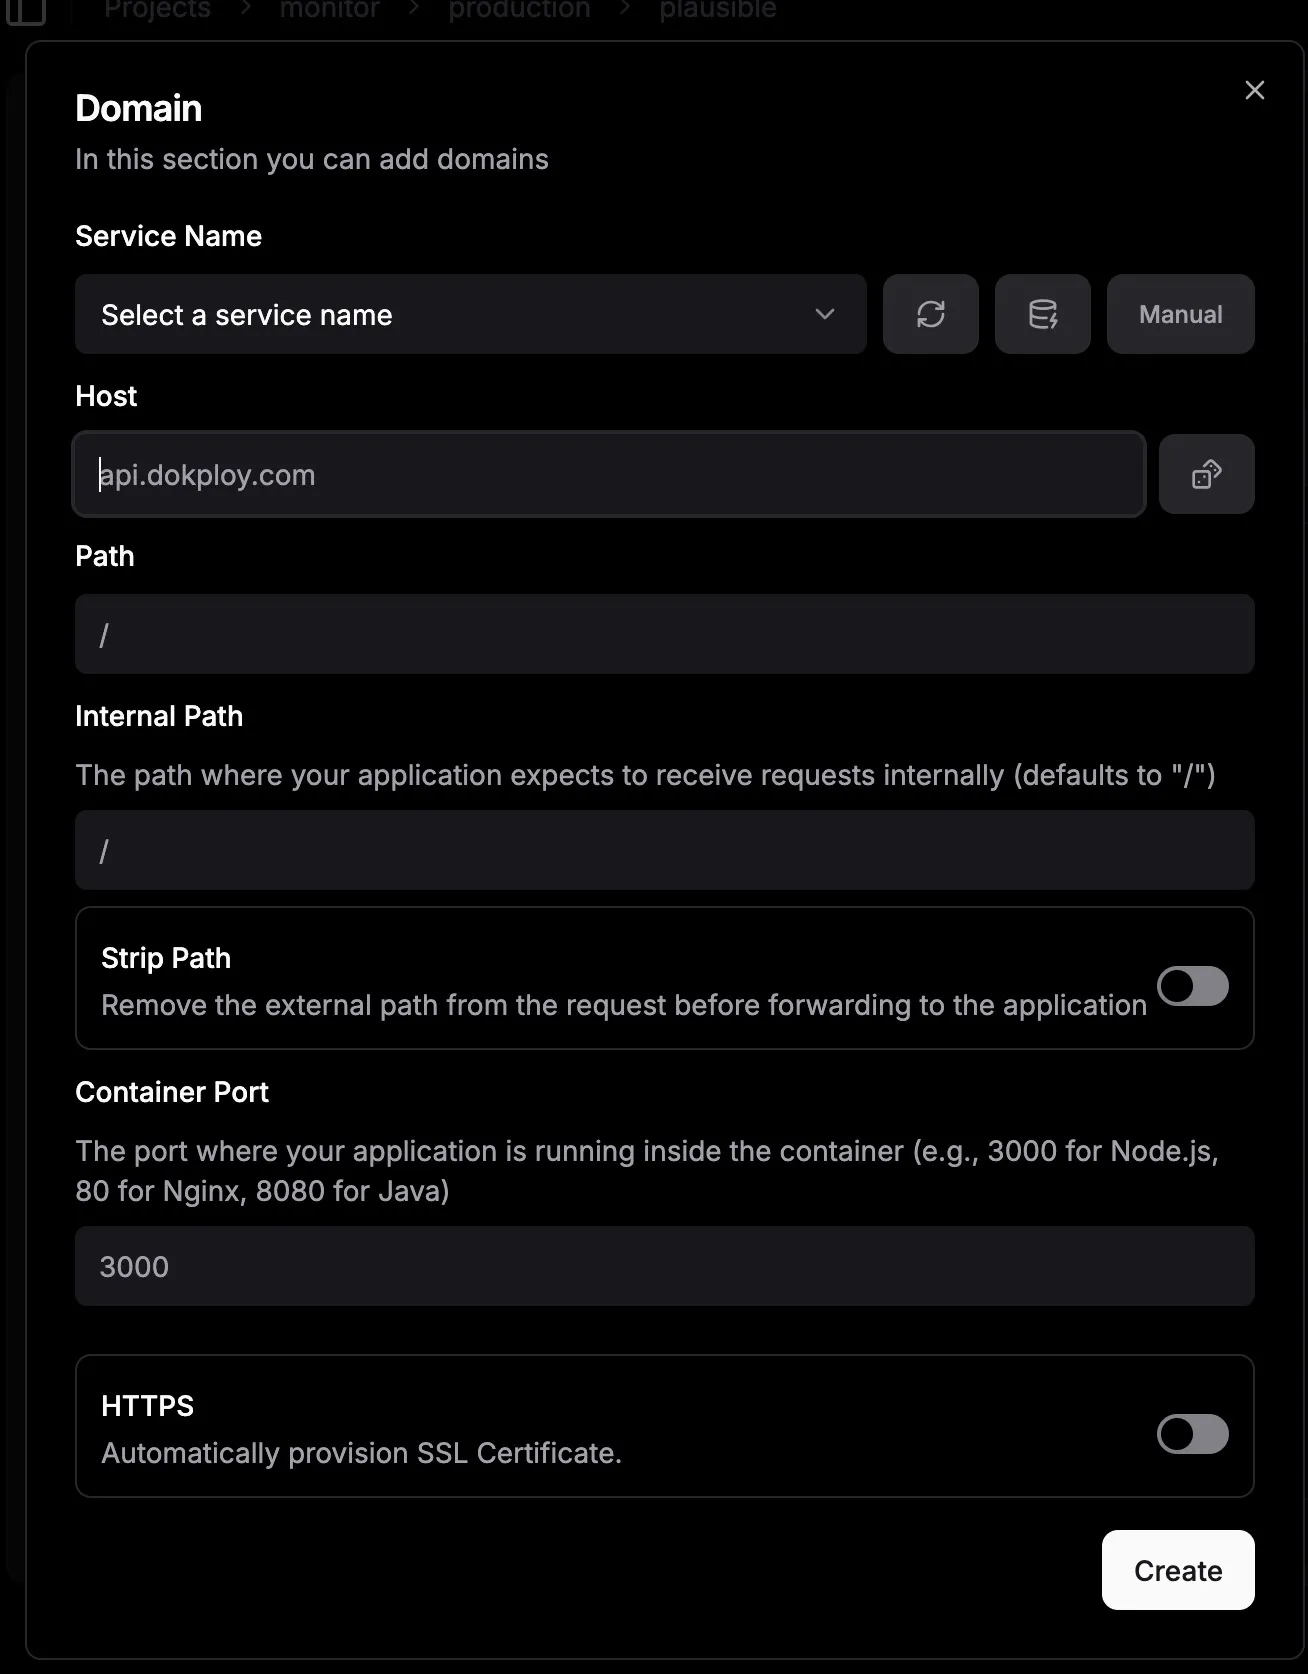
9. Customize the Service Domain
Once the service is deployed, change its default domain to match your custom domain (for example: analytics.yourdomain.com).
You also need to set another A record in your DNS provider for this subdomain.
analytics A yourdomain.com <SERVER-IP>
10. Redeploy the Service
After updating the domain, click Deploy again in the General Tab. Dokploy will restart the service with the new configuration and automatically configure SSL via Let’s Encrypt if you set the HTTPS-Switch to on.
🎉 Success!
You now have:
- A running Dokploy instance on Hetzner
- Your first project created and served from a custom domain
- A monitoring/analytics service (Plausible) running via template
From here, you can explore more templates, deploy additional services, and manage everything through the Dokploy dashboard. There are a lot of interesting services integrated as templates, such as:
- n8n - Workflow Automation
- Uptime Kuma - Self-hosted monitoring
- Ghost - Blogging platform
- OpenWebUI - AI image generation and many more!
For more information, check out the Dokploy documentation.
Contact me for help or questions: [email protected]